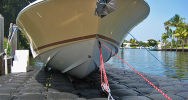
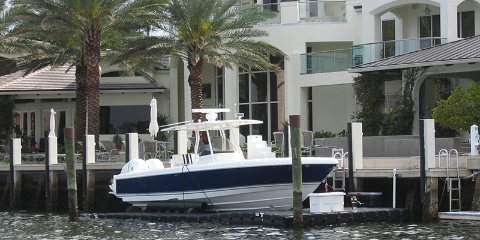
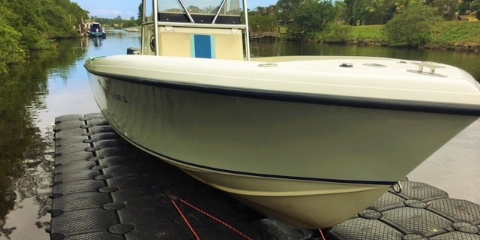
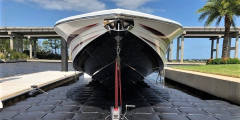
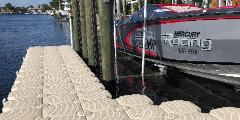
 Boat Docks
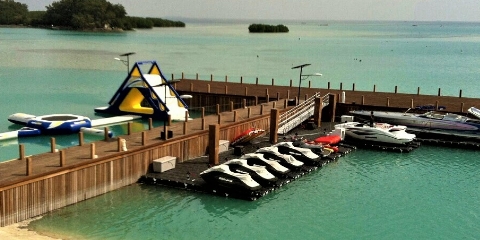
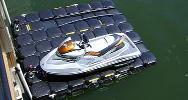 PWC Docks
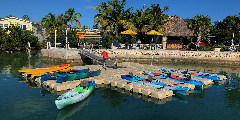
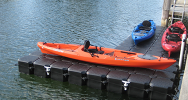 Kayak Docks
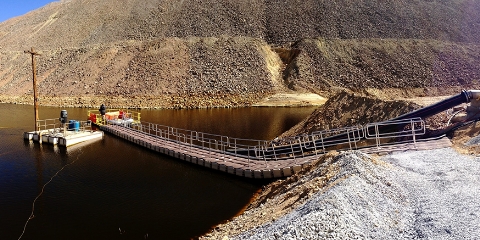
 Floating Walkways
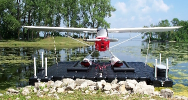 Seaplane Docks
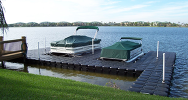
 Residential Docks
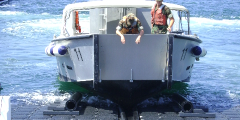
 Commercial Docks
 Saltwater Docks
 Lake & River Docks
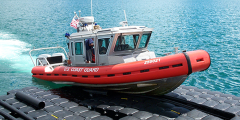 Government Docks
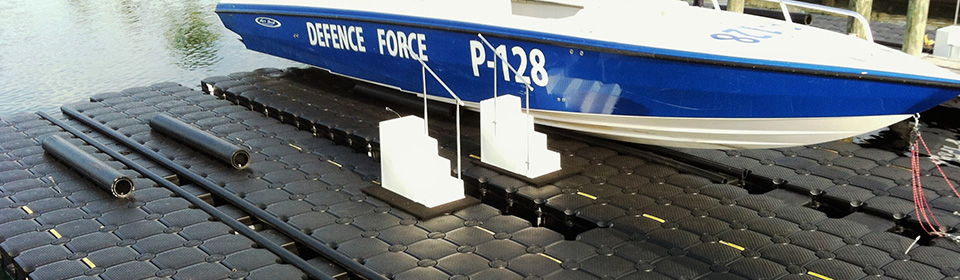
 Military Docks
 Parks & Recreation Boat Docks
 GSA Information
 Dealer Application
 Dealer List
 Jet Dock Advantages
 Boat Lift Photos
 Boat Lift Videos
 Knowledge Center
 Marine Forecasts
- What do I need to know?
- PDF Library
- Drive-on & Launching
- Floating Dock Assembly
- Boat Mooring & Installation
- Maintaining Your JetDock
- The Competition
- Questions for the Competition
- Environmentally Friendly
- Boat Lift & Boat Dock Legislation & Permitting
- Moving A Boat Lift
- Dock & Boat Lift Maintenance
- News & Articles
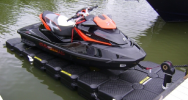
How to Build a Jet Ski Dock or Lift: Simple Assembly Instructions (Video)
There’s no better way to zip around the water than on a jet ski. Fast, smooth and endlessly fun, jet skis offer a quick and easy way to get out on the lake with friends and family for hours on end. But they still need to be cared for through necessary jet ski maintenance procedures. One of the easiest ways to protect your personal watercraft is to invest in a Jet Dock jet ski lift.
Not sure exactly how to build a jet ski dock? Don’t worry. At Jet Dock, we take care of all the engineering, dock plans and pre-assembly for you. It couldn’t be any easier!
The following is an abbreviated set of jet ski lift assembly instructions to help you construct your new dock. For a complete walkthrough of the installation process, view the video below in its entirety and read your specific dock’s instruction manual.
Jet Ski Lift Assembly Instructions
Estimated Time: 1 hour
Required Crew: 2 people
Required Tools: Customer tool kit, socket set and ratchet driver
Step 1: Prepare For Jet Ski Dock Assembly
Before we get started, you need to determine where your system will be installed and where you’ll assemble the dock. The recommended site condition for jet ski dock assembly is a flat, unobstructed area, preferably concrete. This allows for easy construction and connection of the two pieces.
At this point, you’ll want to note that the rightmost dock, when facing the bow, is called the starboard dock and the leftmost dock is called the port dock. Be sure to remove the connecting pins and the bow and stern fasteners (which were shipped on the starboard dock), then place them in a safe area.
Step 2: Align Bow Tabs
Begin by pivoting the bow sections together and align the bow-most tabs in the proper tab-stacking sequence. Note that the bow tab on the port dock is placed over the bow tab of the starboard dock. Insert the provided fastener and tighten using your customer tool kit. Position yourself at the stern of the port dock and slowly lift it. Pivot the port dock tabs over the starboard dock tabs to maintain the proper tab stacking sequence.
Step 3: Insert Connecting Pins
Once the system is in this configuration, place the handle of the assembly key into the second pin opening from the bow. Then, pry the docks so that a connecting pin can be inserted into the first pin opening from the bow.
Using the assembly key, lock the connecting pin by rotating it 1/8th of a turn. The pin’s reference medallion should be oriented the same as the reference medallions on the adjacent cubes. Once the first connecting pin has been locked into place, put the handle of the assembly key into the third pin opening from the bow to pry the docks together. This will then allow the connecting pin to be inserted into the second pin opening from the bow. Insert and lock the connecting pin. Continue to add the remaining connecting pins using the same technique, always utilizing the assembly key to assist with the alignment of the tabs. Work your way sternward in a zipper-like fashion.
To assist with the insertion of the last two connecting pins, place a support underneath the small cube to hold up the tab four corner. This prevents the tab from dropping away when the pin is inserted. Once again, using the assembly key as a pry bar, insert and lock the pin.
Step 4: Complete Assembly
Complete the assembly by connecting the stern tabs, utilizing a fastener and two spacers. The spacers should be inserted between tabs one and four to take the place of missing tabs two and three. Then, insert and tighten the fastener.
Your backup safety winches are shipped separately to prevent damage. Install your winch by unloading approximately half the length of the strap from the reel. Remove the stainless-steel mounting hardware from the top deck of the winch cube, place it through the winch base and tighten it securely.
Step 5: Launch Your Jet Dock
You jet ski floating dock is now ready to be launched! Secure a minimum of two safety lines to your dock and be sure that the winch handles are located over the dock’s surface to avoid damage. Be extremely cautious when launching the dock to prevent any of the cubes from being perforated on a sharp sea wall or deck-mounted cleat.
With the help of a second person, launch the system and temporarily tie it up in the location where it will be moored. To finish, follow the provided instructions for dock mooring.
At this point, you can now drive your jet ski onto your floating dock.
Upgrade Your Jet Ski Storage Today
Now that you know how to build a jet dock, with a little information from you, we can prepare a system customized to your needs. And with Jet Dock, you’ll spend a fraction of the time assembling your new system with a superior result! For more information on Jet Dock’s floating lift systems, reach out to a JetDock dealer today.
Find Your Dock Now
By answering a few quick questions we will be able to tell you which dock or boat lift is the perfect fit for you.
Start Now! ▶Jet Dock Systems manufactures specialized floating boat lifts and drive-on docking systems for a wide variety of watercraft in just about any marine environment. Our headquarters and manufacturing operations are located in Cleveland, Ohio. We have an additional facility and staff in Fort Lauderdale, Florida as well as boat lift dealers all over the world.