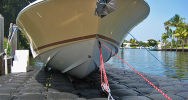
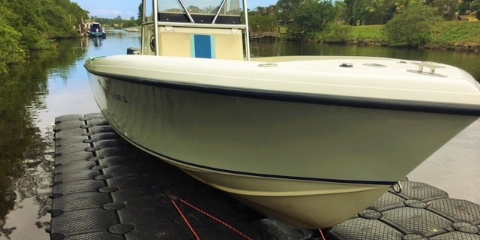
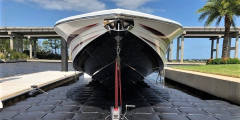
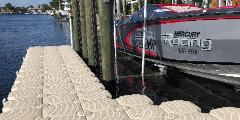
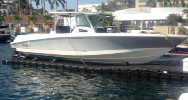
 Boat Docks
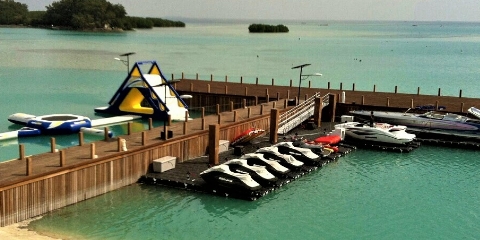
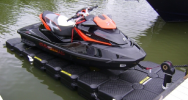
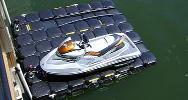 PWC Docks
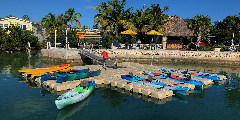
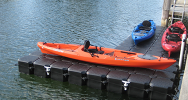 Kayak Docks
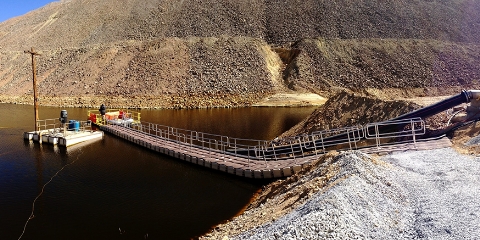
 Floating Walkways
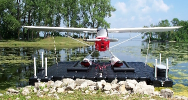 Seaplane Docks
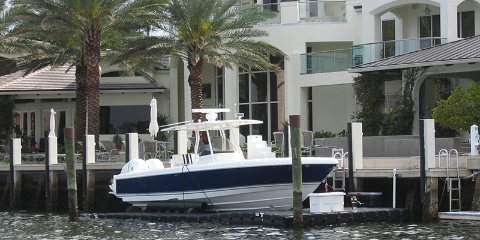 Residential Docks
 Commercial Docks
 Saltwater Docks
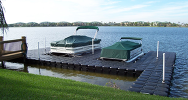
 Lake & River Docks
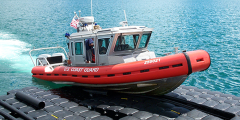 Government Docks
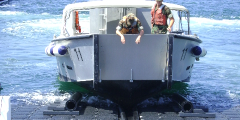 Military Docks
 Parks & Recreation Boat Docks
 GSA Information
 Dealer Application
 Dealer List
 Jet Dock Advantages
 Boat Lift Photos
 Boat Lift Videos
 Knowledge Center
 Marine Forecasts
- What do I need to know?
- PDF Library
- Drive-on & Launching
- Floating Dock Assembly
- Boat Mooring & Installation
- Maintaining Your JetDock
- The Competition
- Questions for the Competition
- Environmentally Friendly
- Boat Lift & Boat Dock Legislation & Permitting
- Moving A Boat Lift
- Dock & Boat Lift Maintenance
- News & Articles
How to Assemble a Floating Dock or Floating Boat Lift (Video)
Floating dock design, boat lift engineering and portable dock building not your forte? Have no fear! With Jet Dock, all the engineering, dock plans and pre-assembly are done for you. In fact, over 70 percent of all Jet Dock customers perform the final assembly and installation of their Jet Dock floating dock or floating boat lift designs on their own!
Even those with no prior marine construction experience are doing it. Conventional dock designs, dock plans, floating dock hardware and engineered dock drawings aren’t even necessary. Jet Dock has taken care of all the details and virtually all of the pre-assembly. With a little information from you, we’ll prepare a system specifically for your watercraft and water site.
The following is an abbreviated guide to assembling your new floating dock. For a complete, step-by-step walkthrough of the installation process, view the video in its entirety below.
Floating Dock Assembly
Estimated Assembly Time: 3 hours
Required Crew: 3 people
Required Tools: Customer toolkit, socket set and ratchet driver
Step 1: Prepare For Floating Dock Assembly
Determine where your floating dock or floating boat lift system is going to be installed. Locate a nearby concrete surface without obstructions where the dock can be assembled.
Remove the pins and fasteners for your floating dock or boat lift, which were attached for shipping purposes. Then begin laying out the sections.
Look at the reference medallions (the diamond-shaped emblems) to help you situate the pieces properly. Make sure they're oriented in the same direction, or you won't be able to complete your floating dock assembly.
Step 2: Begin Connecting Sections
To connect the sections, you'll need to align and stack the tabs in a particular order. First, pivot the middle section toward the bow section on the port side so that the holes in the tabs overlap. Make sure the tabs are stacked in the proper order so that the sections sit completely flush. Secure the tabs with a fastener and tighten them.
Next, position yourself on the bow starboard corner of the middle section and pivot it into the bow section, once again maintaining the proper tab stacking sequence. If there are any "missing" tabs within the sequence, indicated by extra space between the tabs, insert spacers.
Step 3: Insert Connecting Pins
Once your floating boat lift or dock is in the proper configuration, place the handle of the assembly key into the second pin opening from the port side. Use it as a lever to force the dock sections snugly together so that a connecting pin can be inserted into the first pin opening from the port side. Then use the assembly key to lock the connecting pin by rotating it 1/8th of a turn. Make sure the connecting pin's reference medallion is facing the same direction as the others. Proceed to insert the remaining connecting pins using the same technique, always using the assembly key to assist with aligning the tabs. Work your way from port to starboard.
Step 4: Secure Remaining Tabs
Secure the three remaining tab locations with the fasteners, making sure to tighten them and inserting spacers when needed. Proceed with the connection of any additional sections using the same technique. (Note: At this point in floating dock assembly, if your system utilizes a bunk system, watch the video and refer to the materials provided with your purchase for full installation instructions.)
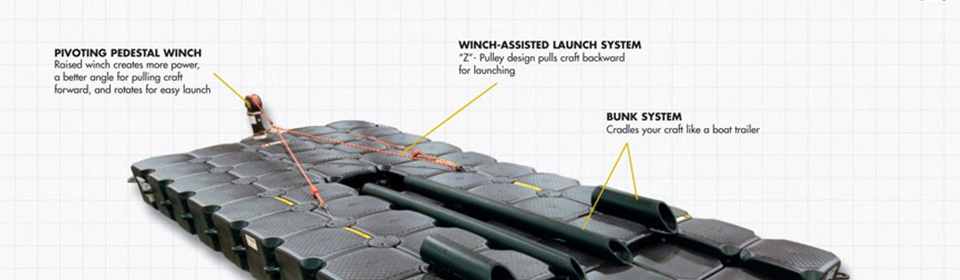
Step 5: Install Winch-Assist Launch System
Secure the looped end of the bungee cord to the shaft of the indicated starboard bow connecting pin. Insert and lock the pin. Secure the deck pulley to the starboard section of the floating dock by removing the indicated connecting pin, passing the knotted end of the line down through the four tabs, securing the knot beneath tab four, and inserting and locking the pin. Be absolutely certain that the knot is secured beneath tab four, and that the line is pinched between the pin shaft and the tabs.
Step 6: Calibrate Winch-Assist Launch System
The winch-assist launch system needs to be pre-calibrated by positioning the winch hook at the estimated location of the watercraft’s bow eye when the craft is in the proper overnight storage position. Pass the loose end of the line through the deck pulley and then through the winch hook. Proceed to the port side of the dock and draw the line tight to remove the slack in the system. Increase the line tension further in order to stretch the bungee and move the stainless-steel ring toward the deck pulley approximately two cube lengths.
While placing your foot on the line to maintain tension in the system, remove the port connecting pin opposite the deck pulley. Tie a large knot in the winch-assist launch line in a position on the line where the tension will remain in the system. Pass the knot and the remaining line down through the four tabs, securing the knot beneath tab four, inserting and locking the pin. Once again, be absolutely certain that the knot is secured beneath tab four, and that the line is pinched between the pin shaft and the tabs.
If adjustments to your floating dock winch-assist launch system are needed, change the length of the line or one or more of the mounting locations.
Step 7: Launch The Floating Dock
Double check that the knot is secured below tab four and that the line is pinched between the pin shaft and the tabs. Your floating dock is now ready to be launched!
Before moving your system into the water, attach at least two safety lines to the dock, and make sure the winch handle is located over the surface of the dock to prevent damage.
With the assistance of another person, launch your floating dock system and temporarily tie it up in the location where it will be moored. When moving the dock into the water, be careful to prevent the winch handle from hitting anything or the deck blocks from being perforated on any sharp surface, such as a jagged sea wall.
If any buoyancy beam or beams were provided with your floating dock, install them at this point. (Note: Continue to watch the full video and refer to the provided assembly plans for full installation instructions if buoyancy beams are provided.)
Step 8: Properly Moor Your Floating Dock System
Your floating dock assembly and installation are almost complete. To finish, follow the provided instructions for dock mooring.
You can then drive your watercraft onto your floating dock and, if needed, add buoyancy to your system to ensure that the stern of your craft and the upper surface of your dock are not in contact with the water. For instructions on how to add buoyancy, watch the video in its entirety.
Don't Have A Floating Dock Yet? Order With Confidence.
Jet Dock floating dock assembly is extremely straightforward when using our video walkthrough. All docking systems are pre-assembled at the factory and divided into portable dock sections for manageable shipping and movement. Each assembly step is backed with instructions, heat-sealed parts packages, boxed and labeled accessories, printed assembly instructions and a detailed, step-by-step assembly and installation video – all designed to make the assembly process fun and successful. And all dock accessories and dock parts are included.
With Jet Dock, you’ll spend only a fraction of the time assembling your system and yield a far superior result – good for a lifetime! No matter the size of your boat, we have a floating boat lift for sale that can be customized for your needs. For more information on Jet Dock’s floating boat lifts, reach out to a Jet Dock floating boat lift dealer today.
By answering a few quick questions we will be able to tell you which dock or boat lift is the perfect fit for you.
Start Now! ▶Jet Dock Systems manufactures specialized floating boat lifts and drive-on docking systems for a wide variety of watercraft in just about any marine environment. Our headquarters and manufacturing operations are located in Cleveland, Ohio. We have an additional facility and staff in Fort Lauderdale, Florida as well as boat lift dealers all over the world.